Tutorial by Jordi Alavedra.
I started this project with the aim of testing how Pulldownit behaves along with Cg fluids, and also as a practice in the use of Pulldownit plugin which was pretty new to me. I decided to make a 3 glasses shot for being more genuine than the usual “wineglass breaking” . Besides looking at the web I hardly found any good test of Pulldownit and fluids, so I was a little scary about doing it, but I have to say it was much easier than expected.
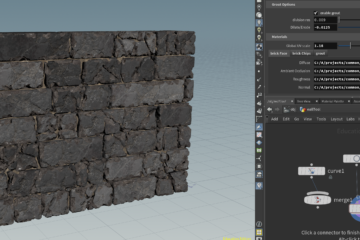
PDi counts with several patterns to shatter the models, fist I did was testing them, I started using “local” shatter style, because of the easy of setting the exact impact point, however I discarded it later because the fragments generated looked more like egg-shell than broken glass, using “radial” style in around 200 fragments each glass and I got a high realistic look, I found out that I had only to adjust the pivot of the model to make cracks matching the impact point with the ball so it was perfect. However I needed the neck of the glasses to remain as one single piece so finally I splitted the glass in 2 parts using “Uniform” style before applying radial shattering.
Dynamics with Pulldownit
My plot was breaking the glasses with Pdi, then add fluids in a second step, however I was worried about whether the weight of liquids would affect the way the glasses breaks or not, so I decided to test it by filling the objects with Maya nParticles, and setting the fragments as Maya nBodies and Pdi Fracture Bodies at the same time, it was perfectly possible and I baked a couple of scenes with different Pdi Fracture settings in this way. I had computed the same scenes previously without nParticles and after looking at one and another, although different results, fragments motion was convincing in all of them, however the scenes including nParticles took at least double slower to compute so I decided to get rid of that approach and compute Pdi dynamics without adding particles.
So I set I fracture body for each glass and a Pdi body for the ball and make it break the glasses, that was easy and looked good, however I wanted the third glass to lean in addition to break, I had to try different things but finally it was possible using Pdi Advanced Fractures by increasing the hardness for the area near the neck of the third glass. I think PDi Advanced Fractures are difficult to play with at the beginning, but once you understand it, they are very powerful to adjust details in fracture.
The computation time with Pulldownit alone was around 5 min, pretty fast and I have to say very stable .I baked everything as Maya keys and saved the scene before going to fluids simulation.
Mixing Pulldownit & fluids
Second step was computing fluids, for that I had to export the original scene with unbroken objects and the final one with fragments and animation to the fluids application, both files were imported without troubles. I needed the original scene to fill the glasses with liquid, for that I created one emitter per glass, adding gravity I filled the glasses at the level I wanted, letting the liquid settle and setting this point at initial state for the fluids.
After that I had simply to replace all solid glasses for the broken ones, simply deleting them and importing the file with fragments and animation keys in its place, computing fluids took about 8 hours in my computer and meshing the liquids around 12 hours.
I imported the fluid meshes back in the Maya animation file, I removed all Pdi dynamics data to let only Maya keys in the scene and really nothing more, for my pleasure fluids and broken fragments matches perfectly when playing the scene, so it left just rendering everything.
Render the scene
Once I have the simulation of objects and fluids done, I had to set shaders and lighting for rendering the scene. I used IBL with HDRI studio lights, glass material was an easy one but shading the fluids took me a lot more, I was playing around with dielectric materials and different Mental-Ray materials, but I didn’t like the look, finally I made my own one, using a blinn material as basis, and adding ramps, surface info and so on to get the look I wanted.
I made some testing with different renders engines and finally decided to go with Mental-Ray because I got the best caustics using it, maybe because Im used to
it, I don’t know. It took 3 days to render both views, side and perspective, after that I did some color correction and deep of field adjustment in After Effects..
Conclusions
Im happy with the result I got, I know inst perfect, but quite believable I think, my first experience with Pulldownit was very good, it is easy to understand and a powerful plugin, my plot was breaking the glasses but two of them had to stand after collision with the ball and the last one leaning and fall, Pulldownit lets me the ability to do it, that’s dynamics control .
Besides It was amusing to work with this plugin, fast response and stable, very nice. The integration with fluids was much easier than expected, it would be great to get involved in a professional project using both tools. www.pulldownit.com